
After the masterclass run by Jon a few weeks ago, I felt confident enough with the gist of Da Vinci Resolve to leave it for now and concentrate on what I was then struggling with: 3D modeling. Colour grading my final shot will be the first time I’ve used the software since that masterclass and going in I was a bit worried that I would not remember everything. Luckily I still had my notes from the lecture that was first given about colour grading.
When colour grading the first 3 things I have to think about before anything else is:
- Skin tone of the talent
- Exposure
- Colour Balance
- Saturation
- Blackpoint
All of these things will have to be normalised before I can move on to creating a ‘Look’ for my shot. For the skin tone of the talent the Ansel Adams exposure chart is very useful.
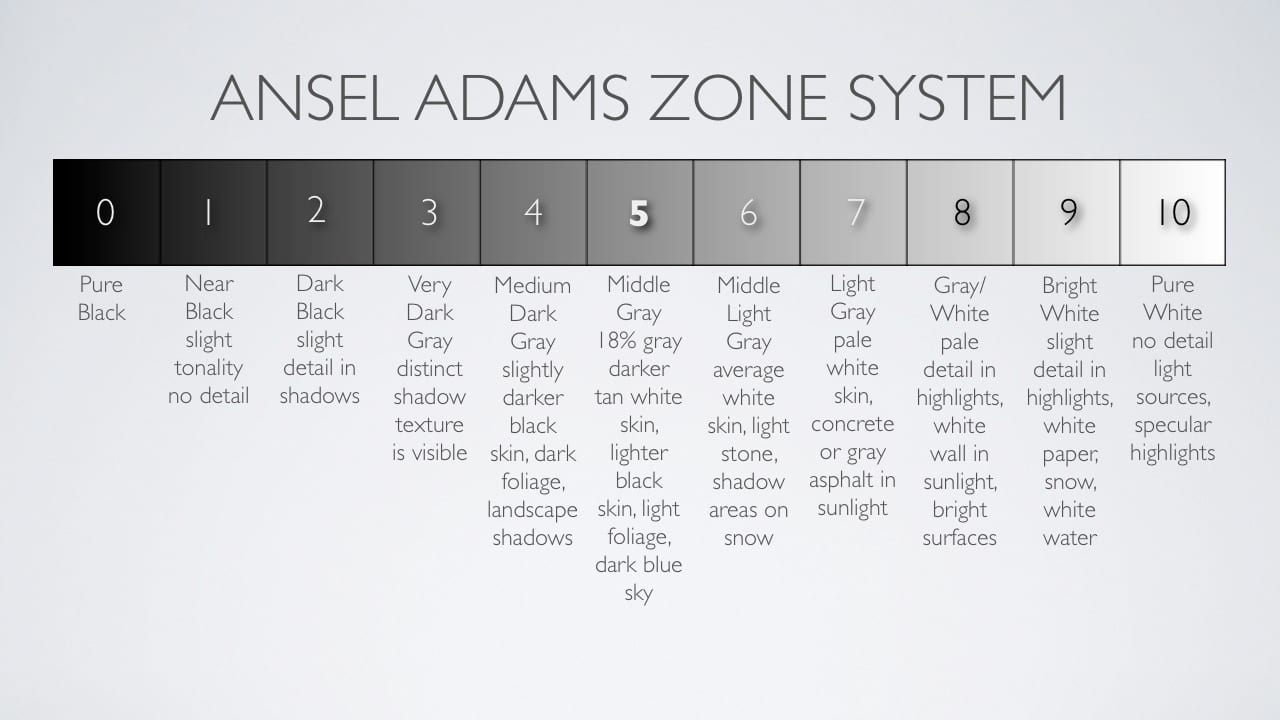
For my blaster shot, the lady in it has a darker shade of skin, this means I will want her skin tone to fall somewhere on the 5-6 of my Y waveform (Luminance).
After I have normalised my clip, I can then create a ‘look’, for this the 3D LUT film looks can be very useful for create a certain tone in my clip. Also using the curves like Hue vs Sat is great at toning down a certain colour within the footage if it is too loud. For my blaster walk footage I want to try and take out some of the greens and yellows in the shot and increase the more blue tones. This is to give the whole things a cooler less nature driven feel. As I will be compositing barrels into the shot, if the colour scheme of it is too natural then the barrels will look very out of place.
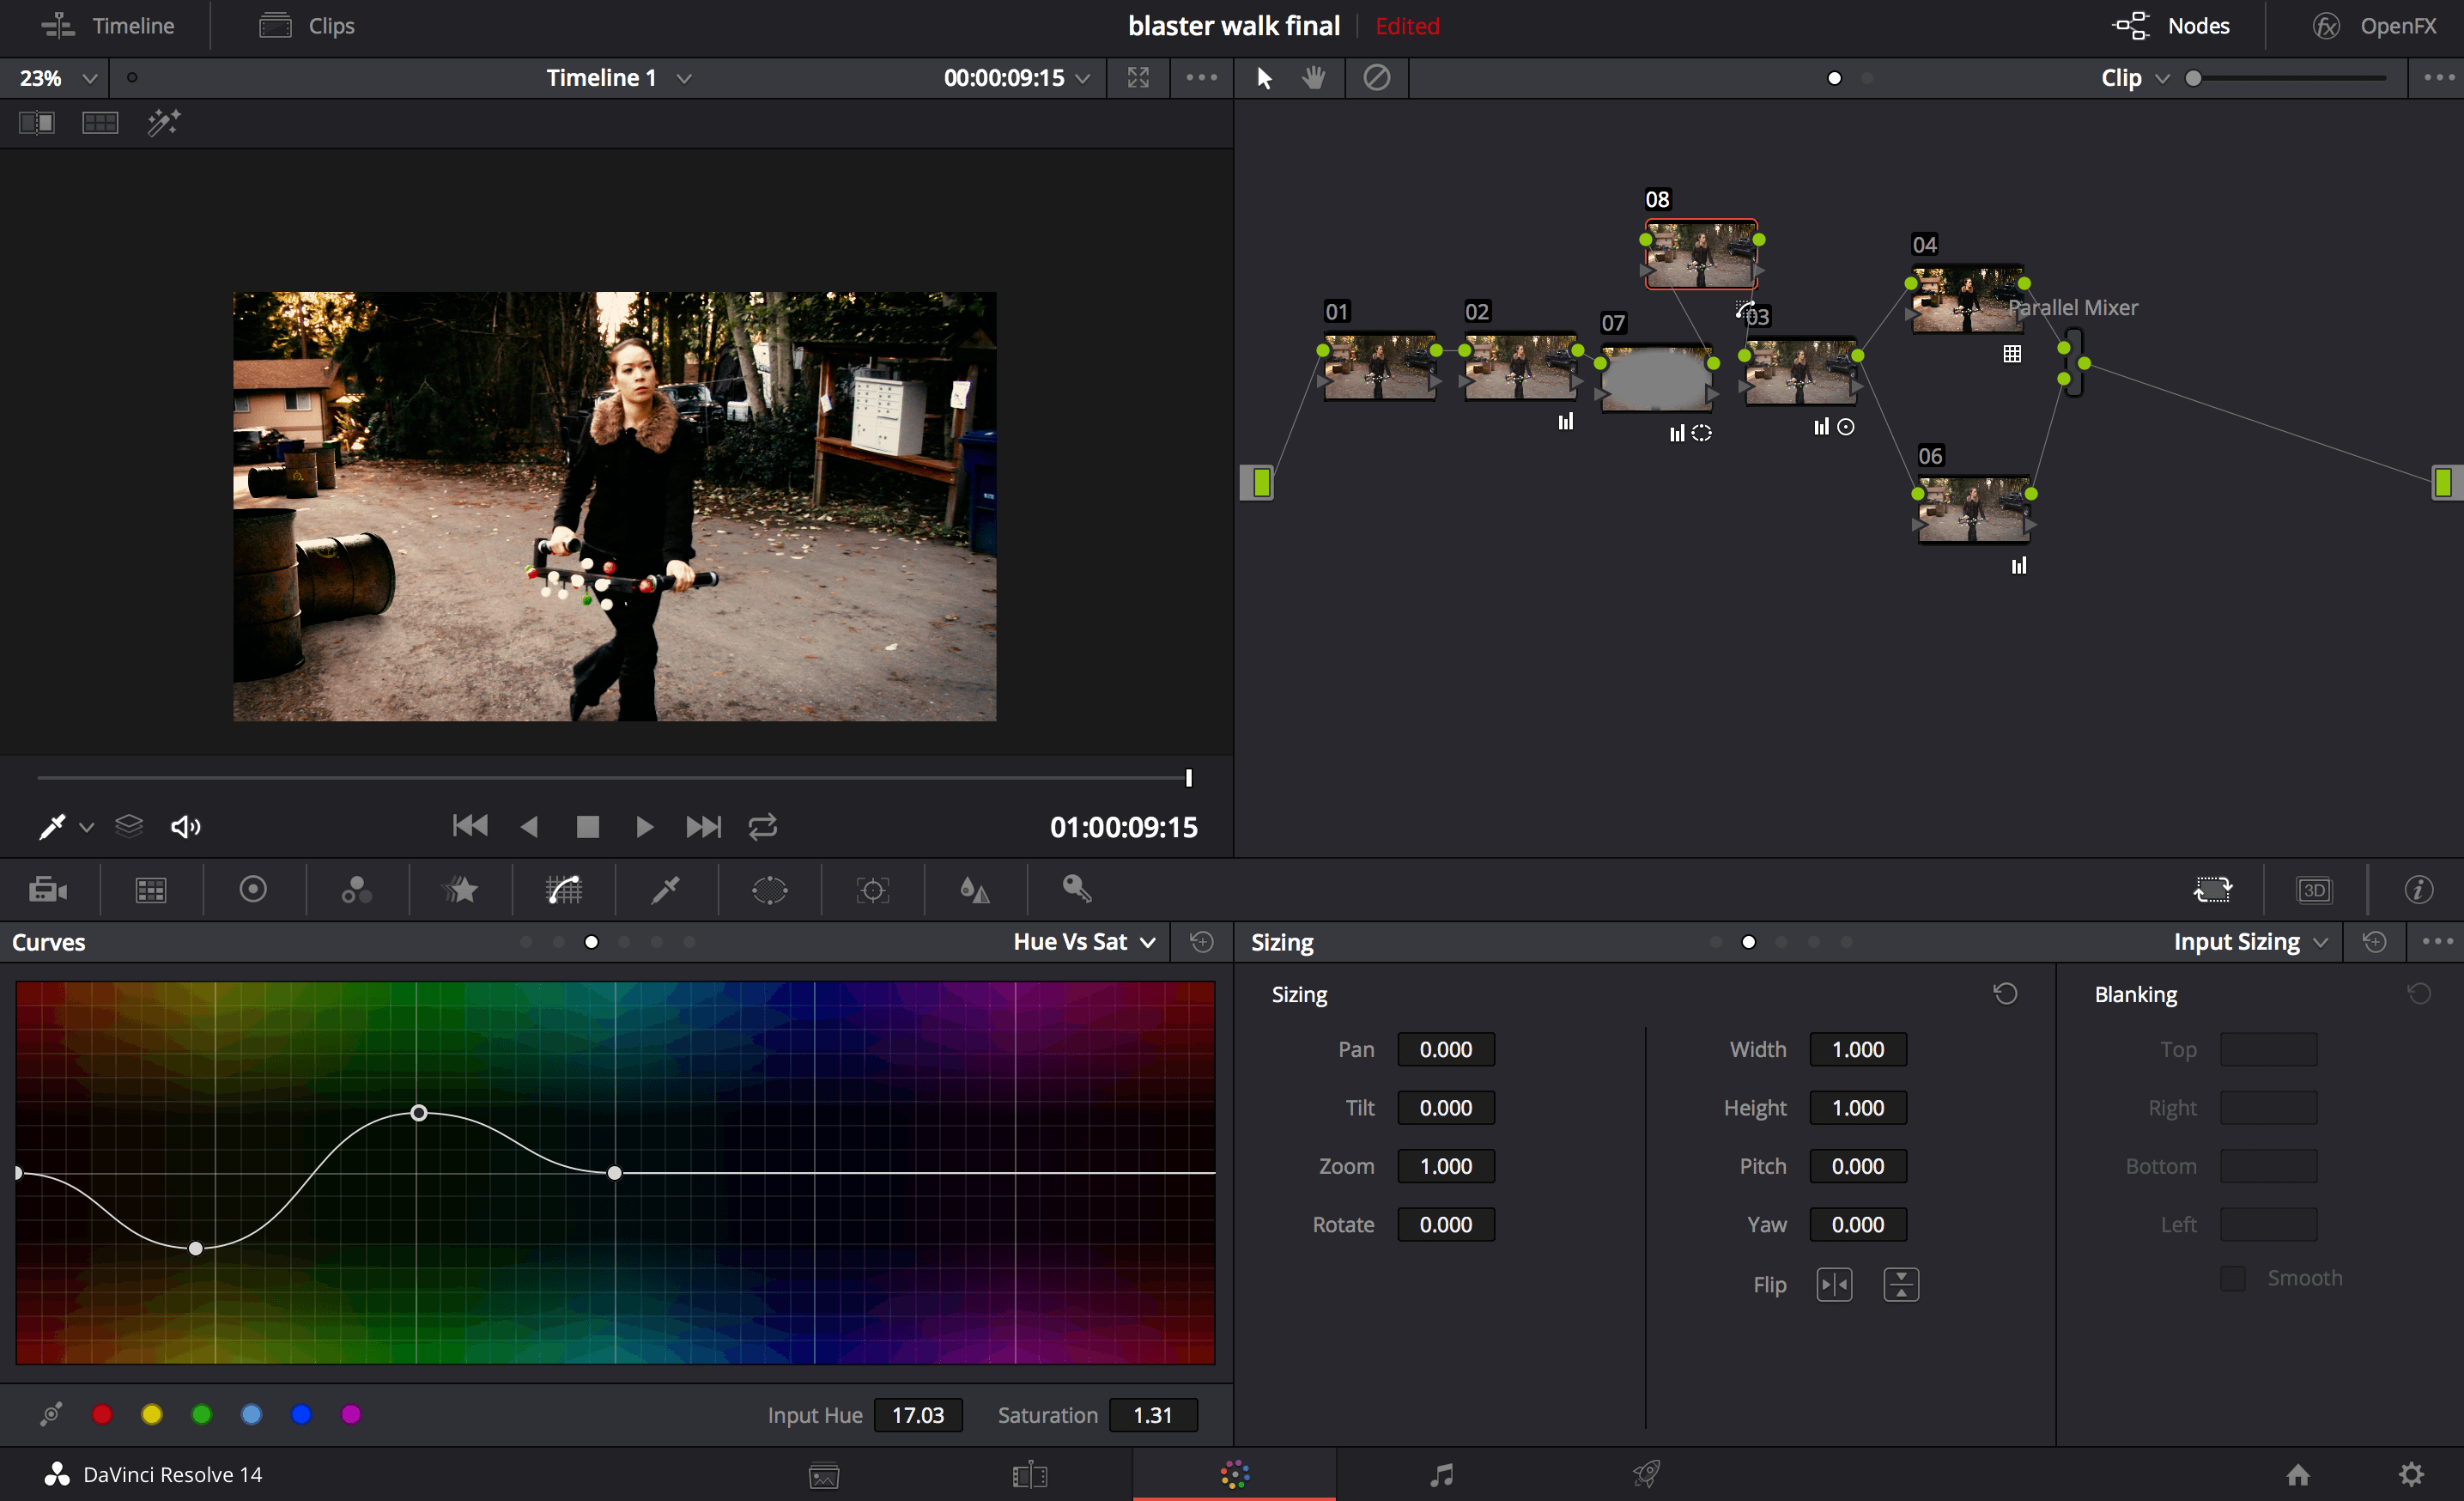
This is what my final ‘Look’ came out like, I ended up going for a more brown tone than blue, as it made the atmosphere feel more grimy. I feel this suited my rusty red barrels more than the cool blue I originally was going to go for. I also used a round mask to make the edges of the scene slightly darker, giving it a almost vignette frame. I still feel that her skin tone could do with a little more adjustment and overall the shot could still stand to be fine tuned some more. However I am still happy with what I have got, next semester I am looking forward to further developing my colour grading skills, now that the steepest learning curve of 3D modeling is over.